Saturday 15 May 2010

Sewing for children


I wanted to relate school and my project together. I brought a sewing kit for children. I thought that this related to my project really well. Children should be taught in primary school how to sew. This activity is really simple. The children are given needles and thread and they have to thread the thread through the holes that have already been made in the foam.

This activity relates to mine really well. The children have the opportunity to make something that they can keep.


All you have to do is go in and out of the holes with the needle.

There are beads within the packaging as well to decorate the sewing pieces.


This is an activity that can be completed as a part of an art lesson. The children will need to be shown how to sew these pieces together but it is a very simple task.

Thursday 13 May 2010

Cross Curricular Links

There are so many possible cross curricular links that my project includes.

Religious Education.

Children could complete a topic about death in school. This could also be completed in P.S.H.E. It is important to talk to children about death as so many children have to hear about their grand parents passing away. This could be based on discussions in the classroom.

Maths.

During the making of my quilt, I had to complete a lot of measuring in inches to work out how big I wanted the quilt, where I wanted the quilt, working in inches to cut the material out correctly. As well as measuring, my project has different shapes in it which could be discussed.


P.S.H.E.

You could take an aspect off the quilt like the image of the bike. A lesson could be based on road safety. As well as this emotions could be discussed. What emotions do we go through in every day life. Look at sad, happy, upset, angry. Talk to the children about how they feel. What makes them happy and what makes them sad.


Geography.

I have used a lot of images of Australia within the project as well as images from Amsterdam. Teachers could talk about the different countries. For upper key stage two, give the children a map and ask them to name the countries. See if they know where Australia is and Amsterdam.

Art.

Children in schools today are taught how to sew. They start with basic kits and during secondary school, children can take textiles and have the opportunity to make things. Basic sewing should be shown in schools.

Literacy.

I was given a beautiful poem after Scott died. Children could make their own poems up. As well as the poem, I wrote words to describe Scott. Talk about what a describing word is aka adjective.

Photography.

I used a lot of photographs in this project. The children in upper key stage 2 should be given the opportunity to use cameras. Use of ICT.

Aqua Beads

I have started to think about how my project links into schools. I started the project working with beads. Children can use beads in school. There are so many possible activities that children can complete.
You can buy aqua beads. These are beads that are laid out on a tray and once they are sprayed with water the beads stick together. This is a simple activity that allows the children to create their own patterns using beads.
Here are some examples of aqua beading.


I would probably complete this type of activity in reception. I would not use this activity in nursery as the beads are too small and the children may choke on them and they are quite fiddly.

quilt nearly finished.

Once I had finished stitching all the pieces together, I had to hem the back of the pieces that were sticking out. They had to be pinned together first and then I had to use a hem stitch to finish the back of the quilt off.

Here I was taking the tacking out as all the layers are now securely together.


Nearly is finished now. I am so pleased with the outcome. All I need to do now is bound the edges to leave a border around the quilt. If you look carefully you can see the wadding behind the images.


I decided that I needed to iron the quilt as some of the parts were not quite straight.


I had to be very careful that I did not iron over the images as the photographs would melt because of the heat.


The last step!


I bound my quilt together to give it a nice border around it. This would tidy up the loose bits around the edges.

I measured out 250 cm of material and sewed the pieces together at 2 inch wide each. I then started to sew this piece around the edge of the quilt 1/4 of an inch at the end. This would attach the edging to the three layers.


This image shows me sewing around the edge of the border.
The last step now is to fold the border over the edge of the quilt and hem the border. This will then complete the quilt. It is approx 60 inch against 60 inches.
Taken a lot of work and time and a lot of headaches but it was worth it in the end and I have learnt a lot, using my sewing machine and learning different stitches.

I started off by adding the two sides on to the pieces. I had to measure these out and cut them exactly to size. I then had to use a straight stitch and attach them 1/4 of an inch away from the side. This took a little bit of practising as I kept going to close to the edge. The shiny side of the material had to be faced down as the material opens out.

This was very stressful as I got really frustrated with measuring all the material. I had to get this all done so that I could get on with the sewing.


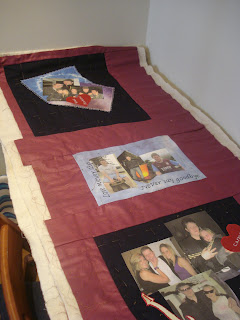
As you can see in the image above the flaps at the side open out. This shows that my patches are coming together. This was a lengthy process as I had to make sure that the pieces of material were in the right place.
I did it in rows of three and then was going to attach the three rows at the end. Each of the patch pieces needed four sides.


Here, you can see that I have attached the centre piece onto one of the other images. Once I started to get into a flow, this process became more easy. As more patches were sewn together, it was a little bit harder using the sewing machine as the quilt started to get a bit heavy.


Once I had sewn all of the patches together in their rows, I had to attach a wadding to the back of the material. I had to lay the backing onto the carpet and using masking tape to hold the material out straight. I then lay the wadding over the top of the black material and put masking tape over that. I lay my patches over the top of this and again held them down with masking tape.
I then had to tack all of the rows. This was so that all of the layers were held together so that when I sewed the images, they would stay together. The tacking was only temporary and the tacking would be moved later on.


I needed to make sure that the three layers were securely together. I went around each of the photographs with a straight stitch with a 3 cm length. This was to secure the images together. This again was a lengthy process but with time and patience this was completed. I made sure I used similar cottons to the material so that you could not really see the stitch.


The next step was to put the rows together. This involved me attaching more flaps onto each of the rows and stitching them together again. This was difficult as the quilt was heavy and my sewing machine is only small.


I could not use a normal foot on my sewing machine as the foot would not have gone through all three layers. I had to use a quilting foot which looks like the foot above. This was easy to put into the machine and was simple to set up.
This foot allowed me to work through three layers and held the stitches securely.

Design


The challenging part of the design was working out where I wanted everything. I had to use grid paper to make sure that the piece was organised properly. Each square on the grid was an inch. I started off putting the centre piece on the grid and then I added the pieces around it.
I completed one design and realized that I had missed out a patch, so I had to rub it out and start it again. This was frustrating as I had to do a lot of rubbing out to get the design the way I wanted it.
I tried to make sure that my dyeing material was separated amongst the piece and that they were not too close together.
After I had completed the design, I had to work out the pieces between the images as I had to put pieces of fabric between each patch to sew the piece together.
Eventually the design was completed and this is in my sketch book.

more images of quilt.


I have added an iron on to this patch to add a bit more colour to it. I saw this iron on in hobby craft. I know that I did not make it myself but it is a different medium. I thought that it was appropriate as Scott liked to have a drink. (or several) Loved drinking a range of drinks including beer, a green monster and turbo! (beer and Smirnoff ice)


On this image, I went around the outline in a different stitch to hold the pieces together as I had stuck the dye material onto a blue background.


I decided that I wanted to put a bike on the patch. Scott loved his bikes over the years regardless of how dangerous they are. He took me on the back of it a view times. Scary! Unfortunately what he loved the most, killed him! He had a beautiful gold bike. He took pride in riding his bike.


I started to lay the patched on the carpet to see how I wanted them to be put together. I moved the patched around in different positions.